
You are here: Home1 / Blog2 / Product Knowledge3 / How to Install Hydraulic Hoses Correctly? A Complete Installation Guid...
How to Install Hydraulic Hoses Correctly? A Complete Installation Guide
Proper hydraulic hose installation is essential for system efficiency, safety, and longevity. Incorrect installation leads to premature failure, costly downtime, and even safety hazards. This guide walks you through the complete installation process—with Utigoflex ensuring you get it right every time.
1. Preparation – The Foundation of a Good Installation
Before you touch any hose, proper preparation is critical.
- Relieve System Pressure: Always ensure all built-up pressure in the hydraulic system is safely relieved. Failure to do so can result in hazardous fluid discharge or serious injury.
- Gather the Right Tools: Have essential tools ready—hydraulic hose cutter, torque wrench, wrenches, and thread sealant. For crimped fittings, a crimping machine is required.
- Keep It Clean: Contaminants in hydraulic fluid are a common cause of component failure. Ensure your workspace is clean and free from debris.
- Wear Protective Gear: Always wear gloves and safety glasses.
Utigoflex tip: Every Utigoflex hose assembly comes clean and capped, ready for installation.
2. Measure and Cut Correctly
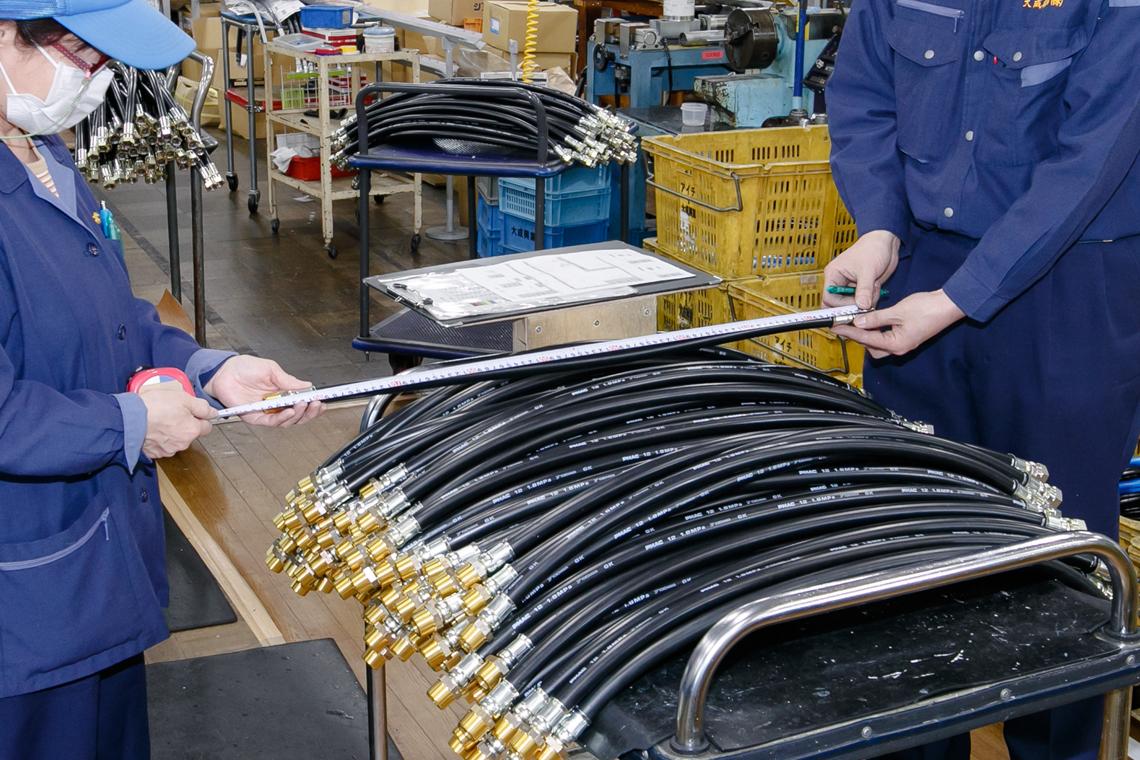
- Measure Twice, Cut Once: Measure the exact length needed, considering routing bends and clearances.
- Allow Extra Length: A straight-line hose must be longer than the port-to-port distance. When pressurized, a hose can shorten by up to 4% (e.g., a 1-meter assembly may shorten by 50mm). Insufficient length stresses fittings and can cause pull-out failures.
- Use a Proper Cutter: Cut the hose squarely. An angled cut prevents the fitting from seating correctly.
Utigoflex advantage: We offer custom-length hoses, factory-cut to your exact specifications.
3. Install the Fittings Properly
Fitting installation is where many failures begin.
- Mark Insertion Depth: Draw a clear line around the hose to identify the correct insertion depth.
- Ensure Proper Alignment: Align the fitting with the hose correctly to prevent unnecessary strain on the assembly.
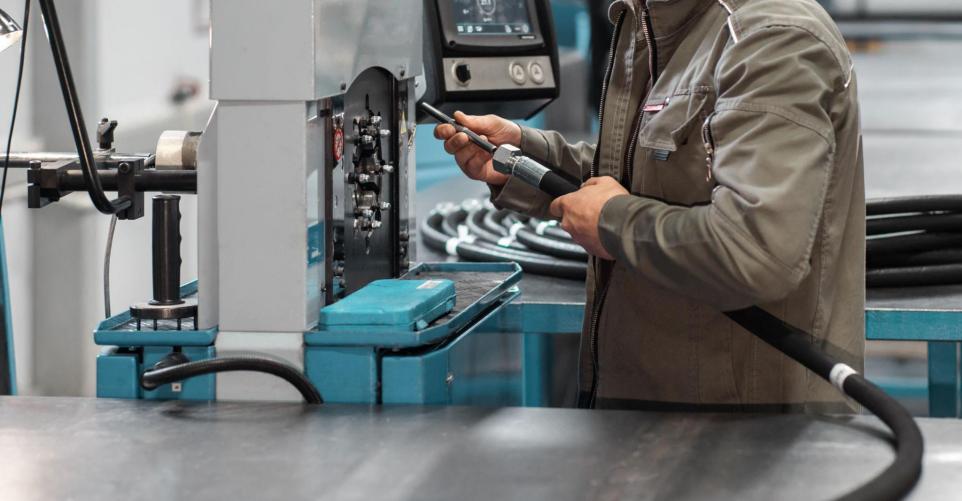
- Fully Seat the Fitting: Push the fitting fully into the hose until it hits the internal stop. For crimped fittings, use a calibrated crimping machine—improper crimping pressure leads to leaks or blow-offs.
- Apply Sealant Correctly: Use thread sealant or tape on tapered threads. Avoid excess sealant that could contaminate the system.
- Tighten to Specification: Use a torque wrench to tighten fittings. Over-tightening damages threads; under-tightening causes leaks. For hydraulic fittings, hold the hose body with one wrench while tightening the nut with another—use three wrenches if necessary to prevent twisting.
Utigoflex solution: We deliver pre-crimped, pressure-tested assemblies with fittings perfectly matched to your hose and port type.
4. Route the Hose Correctly
Routing determines how long your hose will last.
- Avoid Heat Sources: Never position hoses next to heat sources. An 18°F increase above maximum operating temperature can cut hose life in half. Use heat shields where needed.
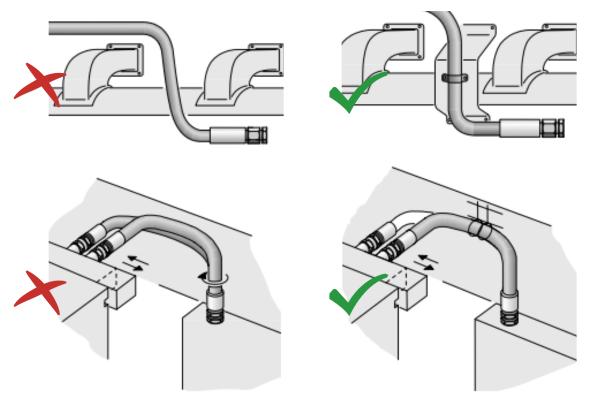
- Prevent Twisting: Twisting a hose by just 7% during installation can reduce service life by 90%. Look at the layline (the continuous writing on the hose)—if it spirals, the hose is twisted.
- Respect the Bend Radius: Never bend a hose tighter than the manufacturer’s minimum bend radius. The bend radius is typically 8–10 times the hose outer diameter. Keep the hose straight for at least 1.5 times the hose diameter from the ferrule before it begins to bend. Bending too close to the fitting stresses the reinforcement and causes premature failure.
- Avoid Abrasion: Keep hoses away from sharp edges, metal corners, and other hoses. Use clamps, spring guards, or protective sleeving to prevent rubbing.
- Allow Slack for Movement: Provide enough slack for length changes during pressure and temperature cycles.
Utigoflex advantage: Our hoses come with clear bend radius data, and our tight-bend series handles confined spaces without compromising safety.
5. Final Checks and Testing
- Inspect the Installation: Check that all connections are secure, there is no twisting, and the hose is not touching abrasive surfaces.
- Pressure Test: Slowly pressurize the system and check for leaks. Never use your hand to check for leaks—pinhole leaks can inject fluid through skin.
- Secure with Clamps: Use clamps to fix hoses in place, preventing movement and subsequent abrasion while dampening vibration.
Conclusion
Correct hydraulic hose installation is not complicated—but it requires attention to every detail: proper preparation, accurate measurement, correct fitting installation, careful routing, and thorough testing. The most common failures—twisting, tight bends, abrasion, heat damage, and improper fittings—are all preventable.
Utigoflex makes installation easier and safer. From pre-crimped, pressure-tested assemblies to clear bend radius data and expert support, we engineer our hoses for reliable, long-lasting performance. Whether you are replacing a single line or plumbing an entire system, choose Utigoflex and install with confidence.
Ready to Improve Your Hydraulic System Reliability?
Get high-quality hydraulic hoses, custom assemblies, and professional support from Utigoflex.
[Contact Utigoflex Today] to request a specialized quote or download our complete technical assembly catalog.

